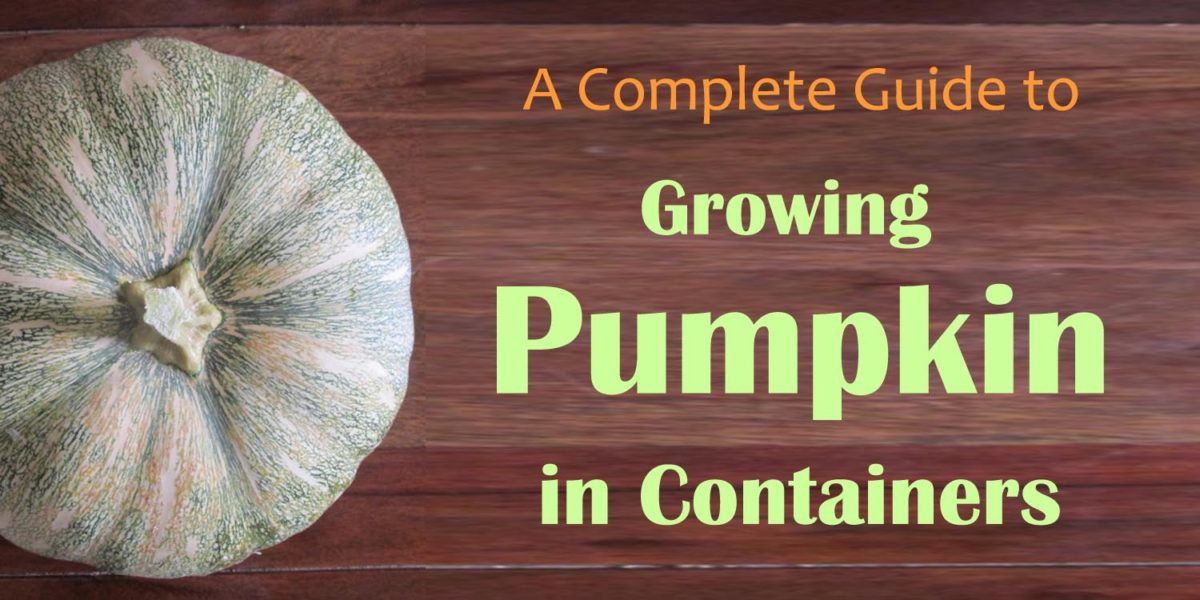
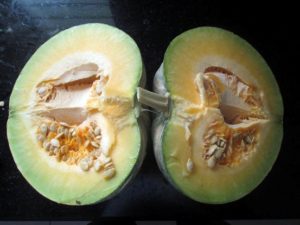
Pumpkin is a great plant to grow in your garden. It grows easily without any hassles provided there is enough nutrition in the growing medium and there is enough light available for it. It is rich in calcium and phosphorous and tastes great in curries and as a soup it is excellent. But the best thing about growing pumpkin is that all parts of the plants including its leaves, stems and flowers are edible and there are simple and great tasting recipes which you can do in a few minutes to enjoy them. However many people feel that Growing Pumpkin in Containers is not a great idea because of the amount of space needed to grow them, and hence do not include this plant in their organic terrace garden. But in reality with a little amount of creativity Growing Pumpkins in Containers is viable even in small spaces.
By the way in case you are new to Organic Terrace Gardening I recommend you to read about the things you should consider before starting your Organic Terrace Garden and a Beginner’s Guide to growing vegetables in containers. These posts would help you to get started in the right direction in terrace gardening.
Quick Reference Table for Growing Pumpkin in Containers
| Item | Value |
|---|---|
| Growing Temperature | 23-32 °C |
| Germination Temperature | 30-32°C Ideal |
| Germination Time | 7-12 days |
| Soil pH | 6.0 to 6-8 |
| Sunlight Need | 6-10 hours per day |
| Preferred Planting Method | Direct Sowing |
| Container size | 30-60 liter depending on variety |
| Time to Harvest | 60-130 days from germination |
| Harvest Period | 30-40 days for the first crop |
| Pollination | Bee Pollination or Hand Pollination |
| Typical Pests | Leaf Minor, Aphids, Ants, Squash bugs |
| Best season to plant in India | Summers and Monsoons |
Before Sowing Pumpkin Seeds
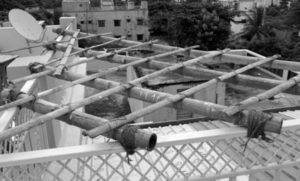
Pumpkin plant is a creeper and spreads out to quiet large areas. Hence you need to have space for it to grow. But that place need not be usable area of your organic terrace garden. It can be let to grow in area where you wont or cant place another plant to grow. You can achieve this by building a trellis. Our terrace is L-shaped. the right angle created by the L-shape is where we build our simple trellis by tying up a few pieces of bamboo in a crisscrossing manner. We were thus using space which was outside our terrace to let the pumpkin plant grow. Depending on how your terrace or balcony is you can design your trellis. In case it can not be done, don’t worry. You can always grow smaller varieties of pumpkins that take less space to grow.
So to cut a long story short for Growing Pumpkin in Containers, either make a trellis for your bigger variety of pumpkin or grow smaller varieties. Also make sure that your plant grows in a place that gets ample sunlight.
Choosing Container for Pumpkin
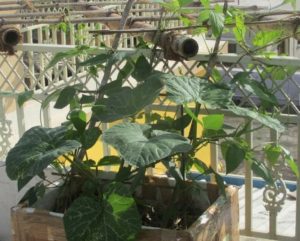
Pumpkin plant is a heavy feeder and its roots need lot of space to grow. For smaller varieties you can go for a 30 liter container, while for bigger varieties 50-60 liter of container is required. Try and go for a container that has bigger surface area, so that the roots get more horizontal space to grow. The container we have used is 2 x 1.5 x 1 ft. Volume wise its capacity is around 80 liters. As we have used a big container, we also planted long beans in the same container. Planting legumes with a fruiting plant helps the fruiting plant by fixing nitrogen in the growing medium.
Seed Sowing and Germination
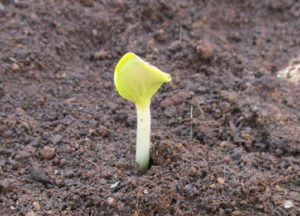
While Growing Pumpkin in Containers, its seeds are sown directly into the container. They develop long roots when they germinate, hence they are not suitable for transplanting. In case you can not sow the seed directly in the intended container for some reason, you can sow the seed in a smaller container (use a 1-2 liter container). And then when the plant has developed 3-4 true leaves you can transplant it.
Pumpkin seeds have a hard cover and hence it can be a little daunting to get the seed to germinate. To speed up the germination process file the sides of the seed with a fine grain sand paper lightly without breaking the seed. It will help the hard cover to open up faster. However do not file the pointed end of the seed. The next thing to do is to soak the seeds in water for 24 hours before sowing. If you can use Amrut Jal for soaking the seed, it works even better.
To sow pumpkin seeds make 1-1.5 inch deep holes in the soil using your finger or any blunt object. Make 4-5 holes par container in the center. You can keep about 1-2 inch distance between the holes. Place one seed in each hole on its side ; i.e the flat of the pumpkin seed should be perpendicular to the flat of the ground. Cover the hole with loose soil. Water your container well. Now all you have to do is keep the medium moist and wait patiently. In about 7-12 days you should see your first pumpkin seedling. When the seedlings have developed about 2-3 true leaves, identify the healthiest plant and pinch off rest of them.
Sometimes seeds do not germinate at all. And low soil temperature could be one of the causes. In such a case use bottle and tissue paper method to germinate your pumpkin seeds. Plant them in soil as soon as they have germinated and before they start developing roots.
Growing Pumpkin in Containers
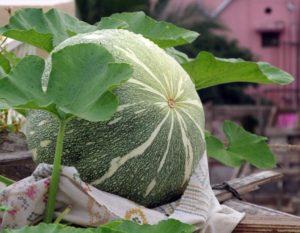
Once pumpkin seeds have germinated growing the plant is a cakewalk. Just water the plant regularly so that the plant does not remain thirsty anytime. During its growth you’ll need to water the plant 1-2 times a day depending on the air temperature. When the plant bears fruit, it becomes very thirsty. You may have to water your plant 3 times in a day during fruiting. Check for drooping leaves during the day and water the plant if needed. Its a good idea to mulch your containers to reduce evaporation of moisture. You must understand the fact that Growing Pumpkin in Containers is not same as growing them on soil. Your container can hold only little amount of water and hence more frequenter watering is needed when pumpkin is grown in pots.
Add about 8-10 liters of compost to your container when you start getting flowers in your plant. Use Amrut Jal or any cow dung based liquid manure to irrigate your plant on a weekly basis. This helps in supplying ready made nutrition to your plant. It also helps increase microbial activity in your soil which breaks up the nutrients into a ready to be taken form for your plants.
Plants grown organically are quiet sturdy and Pumpkin is no different. However check for leaf minors every 2-3 days. In case you spot any leaf with leaf minor trail, remove the part of leaf, in which you see the trail and throw it away. The whole leaf need not be broken off. For aphids use water spray. Avoid using neem spray on pumpkins. Pumpkin leaves tend to burn when neem based spray is used on them. Dilute your neem based spray if you have to use it. Use a general organic spray like Panchagavya to keep pests away and to promote better growth of the plant.
Pollination of Pumpkins
Pumpkin plant produces both male and female flowers. Female flower buds have a small pumpkin attached to the bottom of the bud. Male flowers have a erect stem in the center of the flower called stamen, which contains the pollen. The pollen comes off easily from the stamen of a mature male flower. Bees pollinate the female flowers with pollen from mature male flower and fruit sets on successful pollination. The first set of flowers to bloom on a pumpkin plant are male flowers. The plant uses male flowers to attract bees. Male flowers bloom for about 7-15 days before the first female bud starts to appear in the plant. For every female flower you would find 2-3 mature male flowers in your pumpkin plant. Bees while flying from one flower to the other pick up pollen from the stamen and pollinate the female flower.
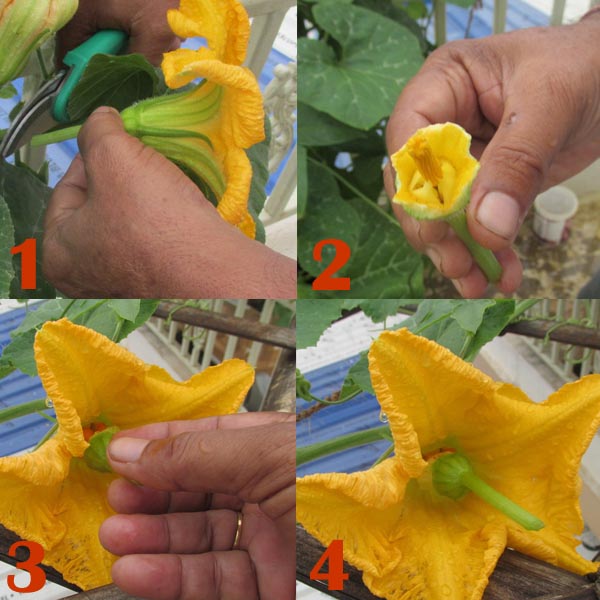
The problem with Growing Pumpkin in Containers in urban areas is that you may not get bees to come and pollinate your flowers. In such a case you have to hand pollinate your pumpkin flowers. Follow the following steps to hand pollinate pumpkin flowers.
- Pick up a mature male flower. Tear off its petals carefully without disturbing the stamen.
- Lightly shake and rub the stamen on the stigma of the female flower.
- Leave the stamen inside the female flower. Wind would further help the pollen to fall off from the stamen into the stigma.
Harvesting Pumpkins
On successful pollination the fruit in the female flower starts to grow. If the pollination is not successful then the fruit dries out and falls off. When the fruit is growing give a support below it in case it is on a trellis. Make sure that support is good to bear 3-5 kgs of weight. You may also cover your fruit loosely with a piece of cloth to keep it out of sight of monkeys. When the fruit starts to turn yellow-orange it is time to harvest. You can let the fruit be on the plant for 15-20 days after it just starts to yellow. If the fruit turns completely orange-yellow harvest it immediately.
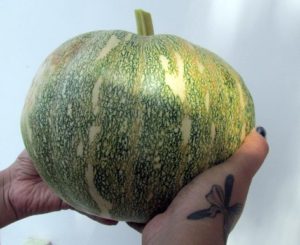
Everything that you need to know about Growing Pumpkin in Containers does not end here. Along with enjoying the fruit, you can also enjoy the flowers and leaves on a daily basis on your dining table. Male flowers can be harvested after 9 AM in the morning when there are no bees hovering on the flowers. You can remove the stamen and store them in fridge for over a day if you are not using them immediately. Except the stamen all parts of the flower are edible. Young stems and leaves can be harvested before fruit sets. After the fruit has set they tend to harden. But you can still get enough leaves at the tip of the vines. It is a good idea to harvest leaves and stem from the longer vines. It also helps the plant grow better.
That is it on growing pumpkins in your organic terrace garden. Happy gardening.
